How to Install Wall Panels Yourself: Step-by-Step Guide for DIY Homeowners in Malaysia 2026
Table of Contents

Introduction
If you are planning a home upgrade and want a more premium wall without doing a full renovation, wall panels are one of the easiest ways to transform a space. They can make a wall look more stylish, more structured, and more custom-designed, especially in living rooms, bedrooms, and TV areas. 🛠️
The good news is that some wall panel projects are possible for DIY homeowners in Malaysia. But the final result depends heavily on preparation, measurement, alignment, and patience. This guide breaks the process down into simple steps so you can decide whether to do it yourself and how to do it more cleanly in 2026.
Why More Homeowners Are DIYing Wall Panels
DIY wall panel installation is becoming more popular because many homeowners want a visible design upgrade without paying for a full interior makeover.
Wall panels are attractive for DIY because they:
create a strong visual change
make plain walls look more premium
suit many modern home styles
can be installed on selected feature walls only
feel more achievable than larger renovation work
For smaller projects, doing it yourself can feel more budget-friendly and satisfying.

What You Need Before You Start 🔧
Before starting, make sure you have the right tools and materials ready.
Common items may include:
wall panels
measuring tape
pencil or marking tool
spirit level
construction adhesive or recommended fixing material
saw or panel cutting tool
safety gloves
cloth or surface cleaner
filler or finishing sealant if needed
The exact list depends on the wall panel type you are using.
How to Prepare the Wall Properly
Wall preparation matters more than many DIY users expect.
Before installation, check that the wall is:
dry
reasonably smooth
clean from dust and grease
free from loose paint or unstable surface sections
You should also:
measure the full wall carefully
plan the panel layout first
identify plug points, switches, or corners that may affect cutting
confirm whether the design will cover a full wall or only a feature section
Good planning usually makes the installation look much cleaner in the end.

Step-by-Step Wall Panel Installation Guide 📏
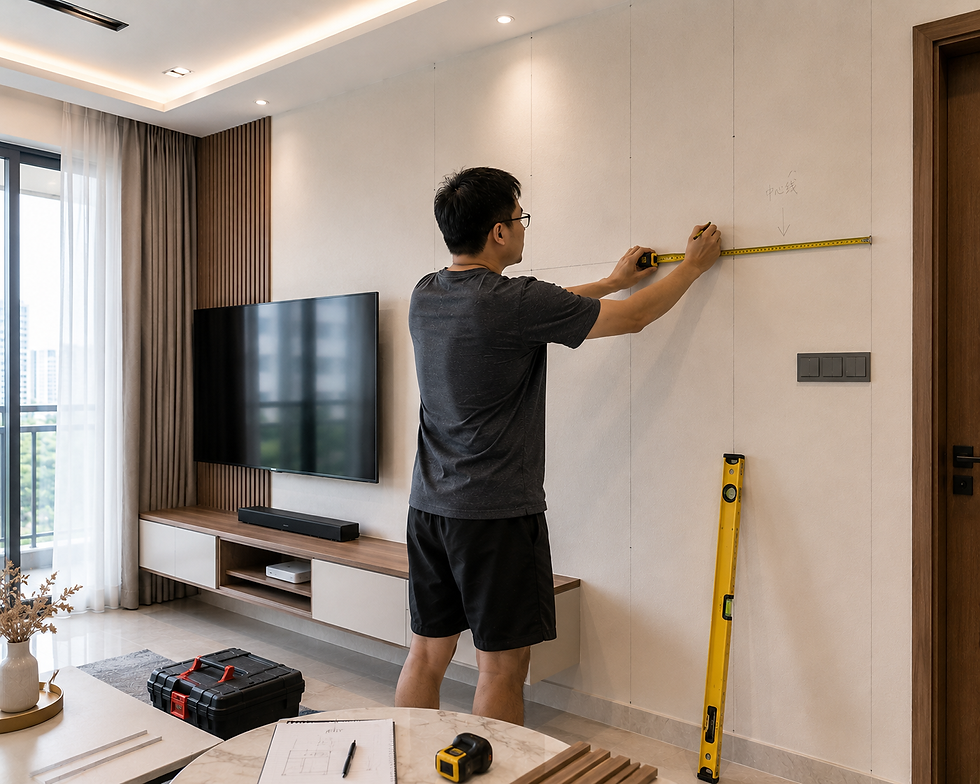
1. Measure the wall carefully
Start by measuring height, width, and any interruptions such as sockets or switches.
This helps you plan your panel arrangement before cutting anything.
2. Mark your layout first
Use a pencil and level to mark guide lines.
This step is important because even a small alignment mistake can become very obvious once several panels are installed side by side.
3. Cut the panels accurately
Trim the panels according to your wall measurements.
Take your time here. Rushed cutting often leads to uneven edges and visible fitting gaps.
4. Prepare the adhesive or fixing method
Follow the product’s recommended installation method.
Do not assume every panel uses the same adhesive or fixing style.
5. Install the first panel carefully
The first panel sets the direction for everything else.
Check that it is straight before moving on. If the first one is slightly off, the whole wall may look uneven.
6. Continue panel by panel
Press each panel into place carefully and check spacing or alignment as you go.
Do not rush just because the first few pieces look fine.
7. Finish edges and clean the surface
Once the panels are installed, tidy the edges and wipe away excess adhesive or dust.
If needed, add finishing touches such as trim or sealant to create a neater look.
Common DIY Wall Panel Mistakes to Avoid ⚠️
A lot of DIY wall panel problems come from avoidable mistakes.
Common ones include:
poor measuring
skipping layout planning
installing on an uneven wall
choosing the wrong adhesive
rushing the first panel alignment
rough or inaccurate cutting
ignoring sockets and switch placement until too late
Even attractive panels can look messy if the installation is careless.
When DIY Is Not the Best Option
DIY is not always the smartest route.
You may want professional help if:
the wall is large and highly visible
the design includes complex corners or built-ins
the wall surface is uneven or damaged
you want a very premium finish
the panels need exact cutting around many electrical points
For many homeowners, DIY works well for smaller feature walls. But for main living room statement walls, professional installation often gives a cleaner result.
Did You Know? 🤔
Many people think wall panels look premium only because of the material. In reality, the premium look often comes from straight alignment, clean joints, and careful finishing. That is why installation quality changes the result so much.
Conclusion 📌
If you want to know how to install wall panels yourself in Malaysia, the most important steps are simple: prepare the wall properly, measure carefully, plan the layout, and take your time with alignment. DIY wall panel installation can work very well for smaller projects when done patiently.
But if the wall is highly visible or you want a more polished finish, it may be worth considering professional help. The best result is not just about installing the panels. It is about making the wall look intentional, clean, and worth the effort.
FAQ ❓
1. Can I install wall panels myself?
Yes, for smaller and simpler feature walls, many homeowners can do it themselves with proper tools and careful planning.
2. What is the most important step in DIY wall panel installation?
Accurate measurement and straight first-panel alignment are among the most important steps.
3. Do wall panels need a perfectly smooth wall?
Not always perfectly smooth, but the wall should be dry, clean, and stable enough for proper installation.
4. What tools do I need to install wall panels?
Common tools include a measuring tape, level, pencil, adhesive, cutting tool, and basic safety gear.
5. When should I hire a professional instead?
You should consider professional help when the wall is large, very visible, uneven, or requires more complex cutting and finishing.



Comments